Are you getting too serious with your home decor?
That’s an honest question. I know I’m guilty of being too serious… of working too hard at getting just the right furniture, window treatments, colors, style, texture, and art for our homes. It’s pretty serious business just choosing the “right” paint color.
Today I’m going to nudge you to put a bit of whimsy in your home and, at least for summer, have fun with your home decor.
Since it’s summer and we often dream of spending time at the lake or ocean…
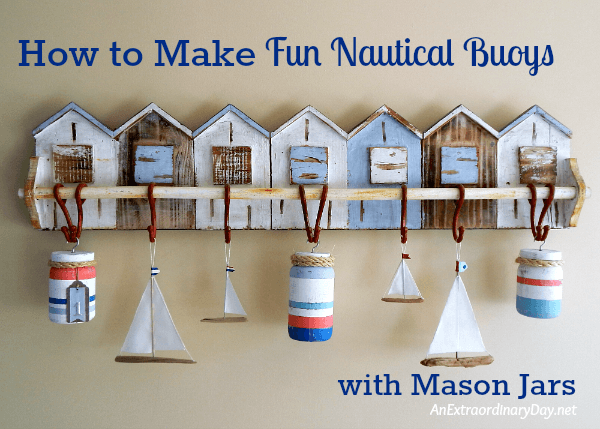
I’m going to show you how to add a whimsical coastal touch, and some fun colors, to your home decor with mason jars.
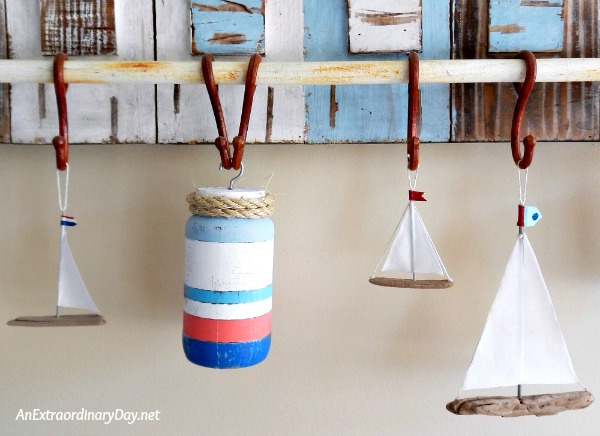
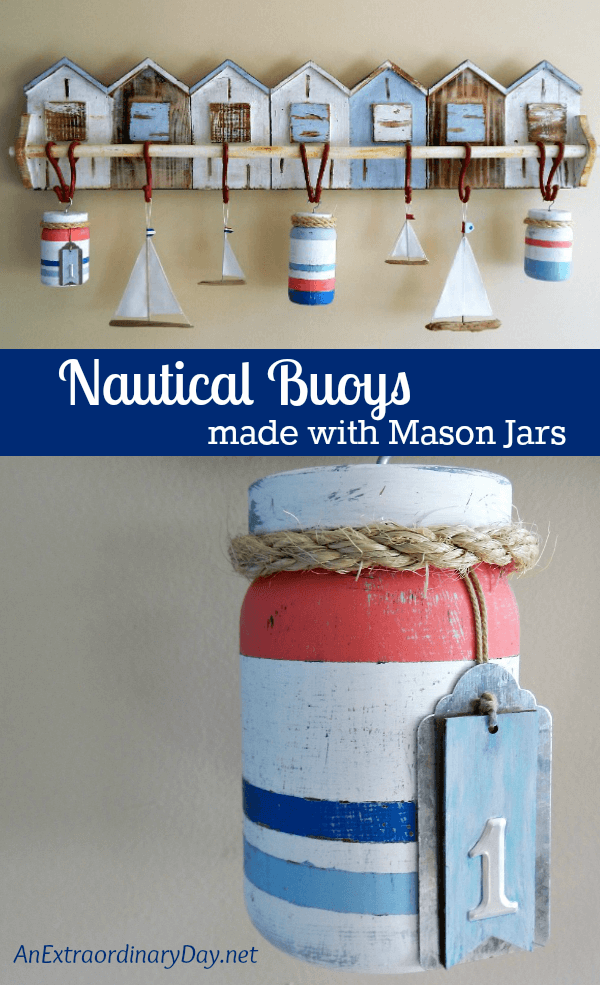
These cute nautical buoys are easy and inexpensive to make and are a great way to be creative with paint.
Let’s get started!
Mason Jar Nautical Buoys
Supplies
*This list included affiliate links*
- pint
and quart-sized
mason jars (I recycled clean empty salsa jars)
- painters tape
- foam and/or bristle paint brush
- craft paint (I used — DecoArt-White, Apple Barrel-Award Blue, Anita’s-Coral Cove, a mix of Apple Barrel-Granite Gray & Blue Cotton, a mix of Apple Barrel-Bahama Blue & Dolphin Grey & Blue Cotton)
- Sisal Rope
- cup hook and speed nut fastener
for each jar lid
- hammer and nail
- scissors
- hot glue
- optional: tags

Instructions
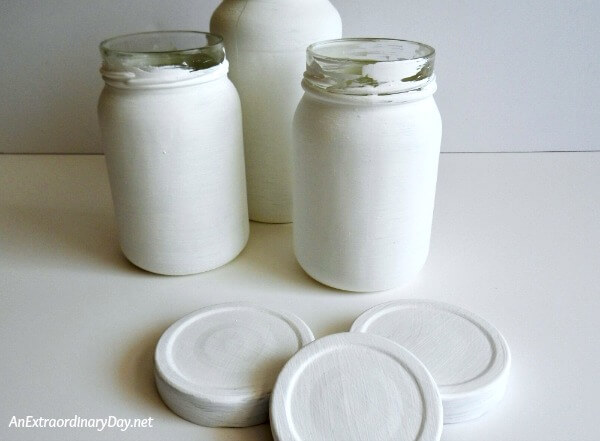
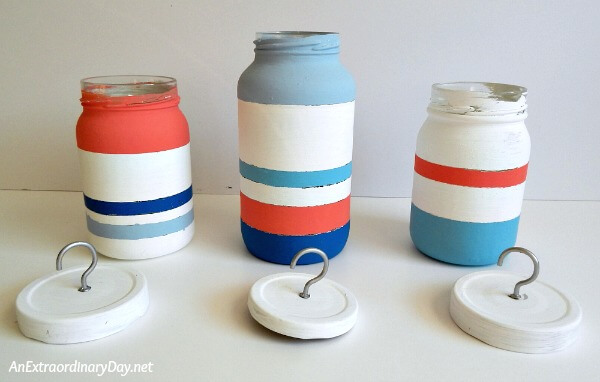
Start with clean jars. I love the standard mason jars but this time, I didn’t want the raised lettering on my nautical buoys. You can use salsa or sauce jars like I did, that equate to the size of pint and quart jars, or purchase the smooth-side Ball mason jars.

Using a foam or bristle brush paint, cover your jars, including the bottom, with a coat of white paint. Allow to dry well.
Paint the lids at this time as well.
Once the paint is dry (I waited until the next day), using painters’ tape, tape a level line around the jar where you want your next colors to be. This is a little bit tricky to envision. Be sure to press the edges down firmly so the paint doesn’t bleed.
Once the paint has been applied, remove the tape, being cautious to lift straight up for a clean break. You may notice a small line of glass… don’t worry it won’t be noticeable in the final product.
Again, I let the paint dry overnight.
Repeat this process for all the different color stripes you want to add to your nautical buoys in the making.
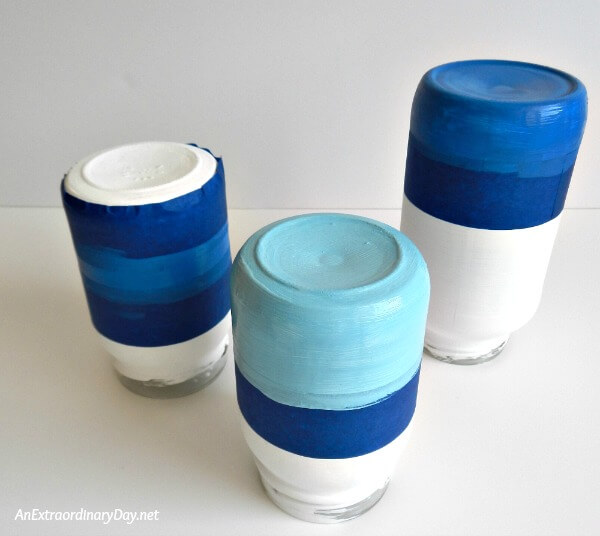
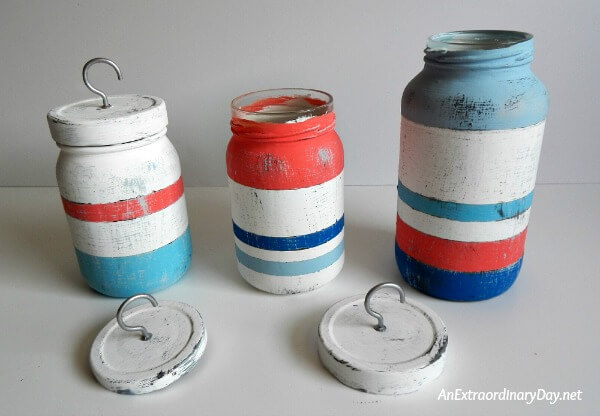
Here are the painted jars once the paint had dried. You’ll notice the lines are not perfect. It’s okay. As a recovering perfectionist I’ve come to realize that these little imperfections add character to the finished product.
It’s time to add the hook to your lids. You can see a more detailed tutorial of that step here.
Essentially, you’re using a nail and hammer on a block of wood to create the hole for the screw end of your hook. Once you’ve done that, insert the hook into the hole and on the underside of the lid, screw on a speed nut fastener to secure it.

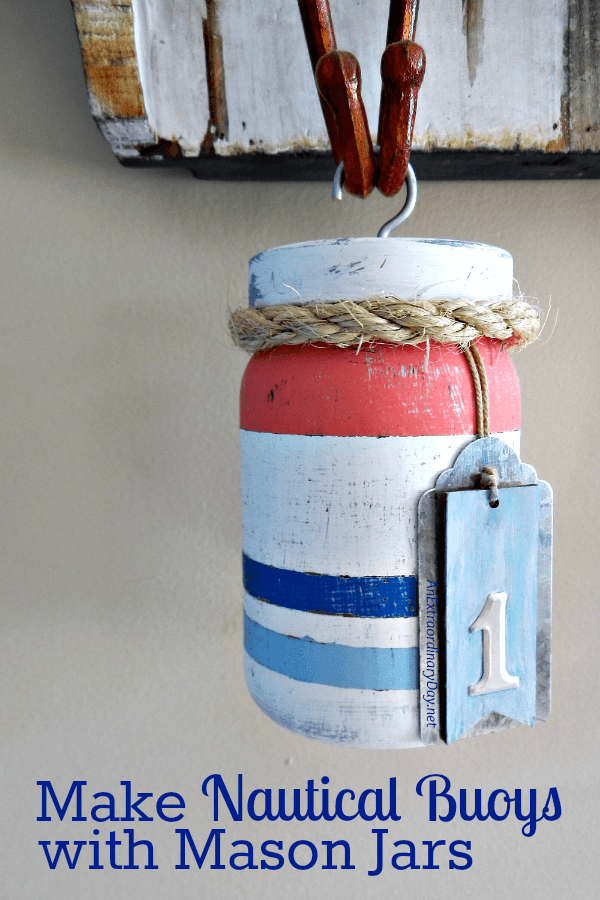
To give the mason jar buoys a more weathered and nautical look, dry brush some gray paint on them.
Screw the lids on the jars, er buoys. And add some sisal rope to complete that nautical look.
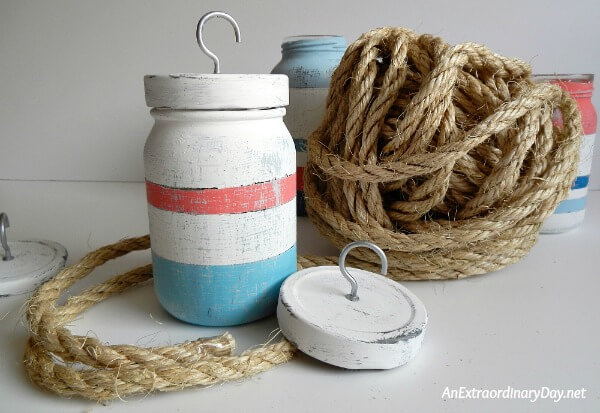
One jar I wrapped the rope around twice, the other jar, just once.
Hold the rope around the jar to measure and cut. Notice I mitered the ends so they would overlap without big bump.
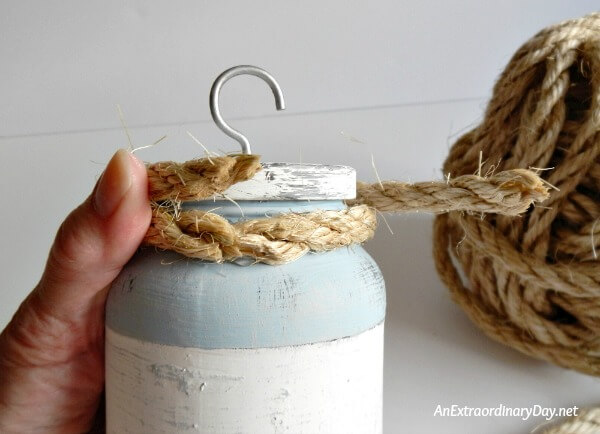
I hot glued the middle of the rope in place and then hot glued each end, being careful to not burn my fingertips. Oh, that does hurt!
I am totally in love with these buoys. Their colors are so bright and snappy and fun.
You’ll notice that I embellished one of the buoys with a tag. This tag was a leftover from my advent candles. It’s a fun addition, but certainly not a necessary one.

They take the seriousness out of decorating and bring out the whimsy.
Warning… the corners of your mouth just might turn up when you finish making these.
Are you wondering about the sailboats? These are some that were left over from my Coastal Christmas Tree.
I realized that I had not photographed my sailboat assembly process… so it looks like maybe I need to do that and create a tutorial for you.

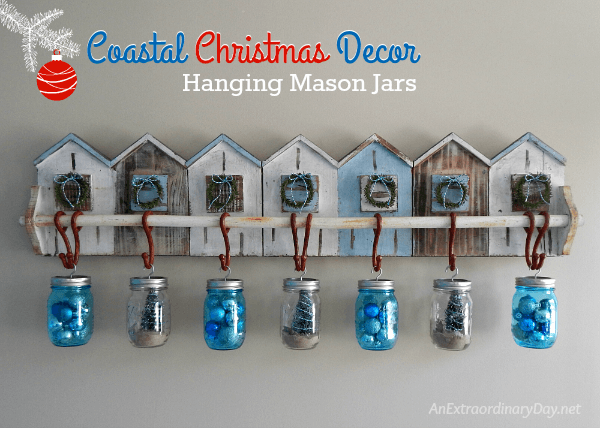
At Christmas time, I added a coastal touch… with mason jars to this same piece of wall art. Another bit of whimsy for the holidays that put a smile on my face every time I walked past.
I love mason jars… for storage and decor.
You’ll want to check out more of my mason jar projects here.
Thanks for stopping by today… I can’t wait to hear your lovely thoughts!

Receive FREE inspiration like this in your inbox!
Sign up Now.


Very neat! ❤️??
Thanks Liza!
All the best for an extraordinary weekend! 🙂
I love this – so fun! I’ve been wanting to paint some jars and just get creative with it.
Wasn’t sure which direction to go in. I love this nautical theme. I miss the water!
Awww… thanks Carole! After being away for many years, I’m soaking up all things nautical/coastal these days. Have fun getting your creative on nautically!
These are so pretty, Diane! You have such a way with decorating. Big hugs xo
Awww….. you just put a huge smile on my face, sweet friend! Thank you!!
Praying your day is extraordinary! [hugs]
Oh my goodness, these are so darn cute! What an awesome idea!
Thanks Meg!! You just put a big-o-smile on my face! {{hugs}}