You know how it goes… you’re out shopping… on a hunt for something specific… and out of the blue… IT calls your name!
How does IT even know your name?
How does IT know you are a lover of all things earthy and natural?
How does IT know you would LOVE a basket that can do double duty for St. Patrick’s Day and Easter?
Especially a lovely mossy Easter basket!
How does that happen?

This post contains affiliate links which help continue all the wonderful content here.


IT has been one busy but smart basket!
I can’t say that you’ll have a basket speak to you like IT did me when you’re out and about.
But, on the outside chance that one calls your name… you’ll know immediately what to do.
Run, don’t walk to the check out…
And once you’re home… begin its makeover to true loveliness.
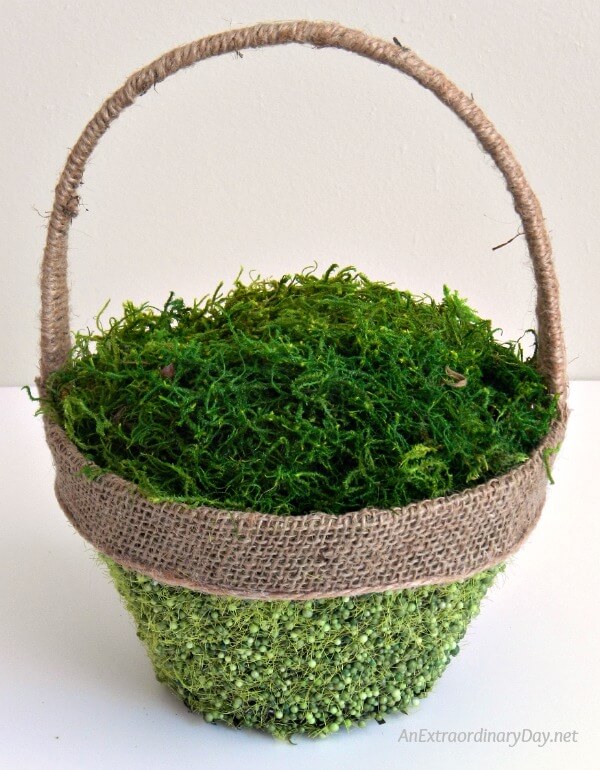
I want you to know that you can create a lovely mossy Easter basket of your own.
It doesn’t have to be this particular one. In fact, my best policy is to check over my stash first. You may even have an old Easter basket that is waiting for a makeover. Hmmm… do you hear her calling your name?
Here are all the juicy details for a lovely transformation….

Supplies
- Basket – Here’s a similar style
– I found mine at TJ Maxx
- Floral Foam – Dollar Tree
- Sheet Moss – Hobby Lobby
- Short Skewers – Walmart
- Happy Easter Sign – Hobby Lobby
- Smallish Sparkly Foam Eggs (not hard plastic) – Hobby Lobby
- Pretty Flowers – Hobby Lobby
- Hot/Cool Glue and/or Tacky Glue
*optional*
A detailed tutorial for filling your basket as you see above is available here.
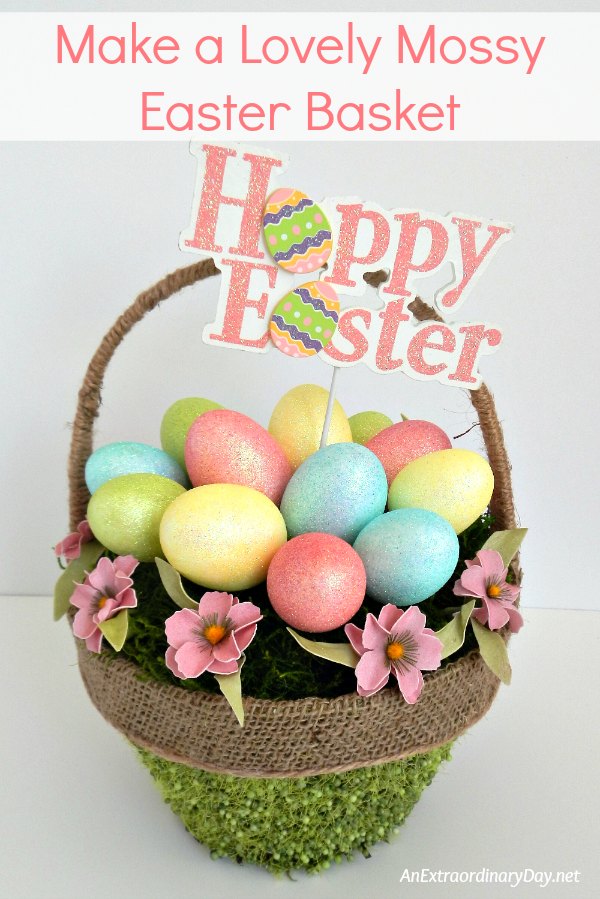
Now that your basket is its mossy loveliness you’ll want to prepare the eggs.

I took small party skewers and inserted the blunt end into the bottom of each egg.
You may wish to add a dab of glue to the end of the skewer to make the union permanent.
I didn’t do this because I’m always re-working something. If my project won’t get jostled around… I go the temporary route for “security.”

Next, decide where you want to place your Easter sign and then press it into the foam firmly.

Add the skewered Easter eggs, by pressing them into the moss, beginning around the “sign-post.”
If you want this to be a more permanent Easter basket of loveliness… you can add a dab of glue to the ends of the skewers before sticking them into the moss-covered foam in your basket.

The basket looks quite nice filled with Easter eggs. But, we want it to look extraordinary… so let’s rim the eggs with pretty flowers.

Now this is where the visual tutorial breaks down. Sorry for my photographic foible.
If you purchased a single stem with multiple flowers as I did, you’ll want to trim them so that their stems are individually about 4 inches or so long. Additionally, I trimmed off some of the leaf stems to insert with the flowers in the basket. This will certainly depend on your flowers… but don’t forget you can add a bit of green and a more natural look by adding in some leaves from your flowers, too.
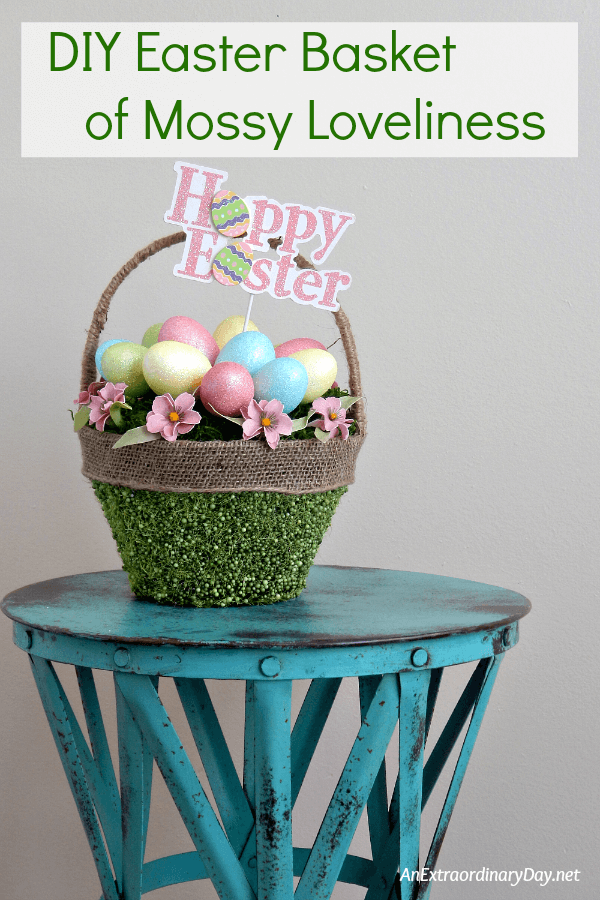
So there you have it…
An easy to create mossy Easter basket of loveliness!
There’s time to make a mossy basket for St. Patrick’s Day and then transform it for Easter as I did here.
Thanks for stopping by today… I can’t wait to hear your lovely thoughts!

Receive FREE inspiration like this in your inbox!
Sign up Now.
A big thank you to my friends at HomeTalk for hosting DIY My Spring! – A home & garden blog hop.
For more Springtime goodness…
Please visit these fabulous blogs for tons of DIY ideas!
And be sure to watch for #DIYMySpring on all your favorite social media stops.


Such a sweet basket!
I love what you did with this basket!! so cute!!
Awww…. you are so sweet to say that. Thank you, Brooke!
You sure got your money’s worth from that cute little basket! That’s my kind of decorating, and they all look amazing!
So fun! I love versatility!!
Thanks Michele… I just might have another idea up my sleeve too. 😉
What a beautiful basket! Love the moss texture and love how you repurposed it for different holidays!
Visiting from the blog hop!
Cheers!
I’m so happy you love it too. 🙂 Thanks for your kind words, Christina and for popping by. Hope your week has been extraordinary!
So cute – love how you used the same basket two different ways!
A lovely idea to cover only half of the basket in moss and the other half in burlap. Lots of rustic goodness here with a touch of Spring vibrancy. Visiting from the blog hop.
Love this! I once found a plain basket at a thrift store that called my name too. Turned it into a fall centerpiece. Now I’m thinking of trying the mossy Easter basket. How do you think it’d look with different colored moss?