Looking for a way to give your tree a little sparkle this year?
Try your hand at making these super quick and easy classy marbleized metallic Christmas ornaments.

As you know… I’m all about adding a personal touch to my home decor. In my book, handmade always trumps store bought. So it was just a natural thing for me to invite my blogging friends to join me for 31 days of sharing handmade Christmas ornaments.
I’m number 5 on the 31 Days of Handmade Christmas Ornament Blog Hop which runs October 1-31, 2015.
I hope you’ve been inspired by the talents of my good blogging friends… Malia, Stephanie, Mary Beth, and Jennifer. Each of these ladies is special to me and I’m thrilled they gave our blog hop an extraordinary jump start!
Before I share my handmade Christmas ornament I want to express my appreciation to Mary Beth – Cupcakes and Crinoline, Malia – Yesterday on Tuesday, and Steph – The Silly Pearl. Choosing to put together a blog hop is no small task and I am indebted to these lovely friends for their wonderful help and encouragement. Ladies… you are the best! Thank you!

When you think of handmade Christmas ornaments,
do you immediately think, “I can’t do that!”
Well… I’m here to tell you, “Yes, you can!!!”
Please don’t say you aren’t crafty or clever or whatever.
Instead say… “I’ll try.”
And when you do… I think you just might be pleasantly surprised with the results.
No idea is totally original. I was inspired by my friend Carolyn and her pretty marbled mugs.
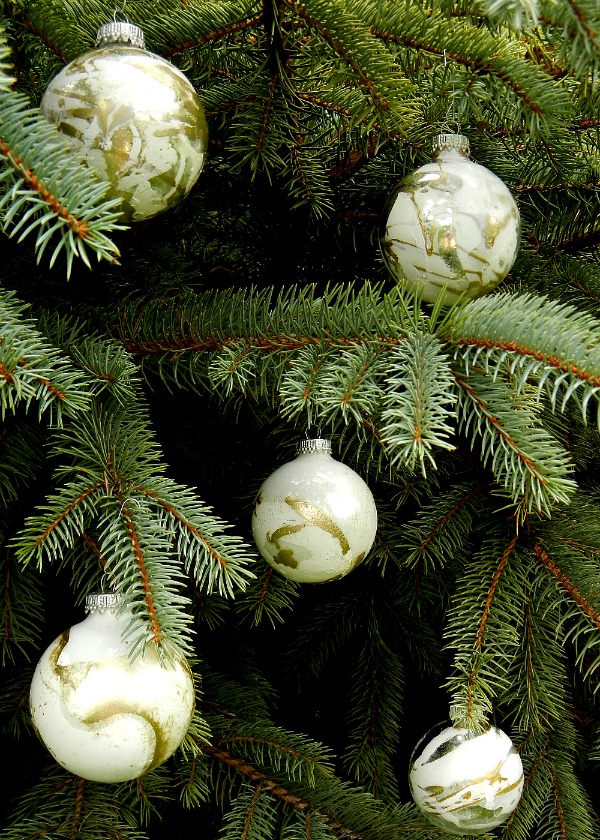
I think you’re going to love making and decorating with these….

Classy Marbleized Metallic Christmas Ornaments
To make your own classy marbleized metallic Christmas ornaments you will need to the following:
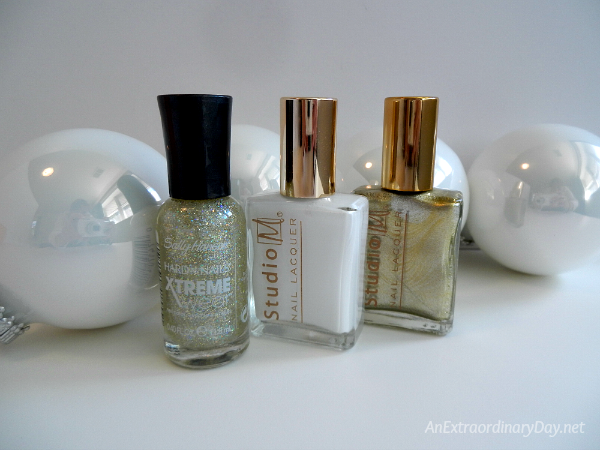
Supplies
- Glass Christmas Ornaments (metallic, plain frosted, or pearlized white)
- Nail Polish – inexpensive and not quick drying. (I used these 3 colors white, gold sparkle, gold)
- Disposable bowl
- Nail polish remover
- Long Dowel or kabob sticks hung between two objects for drying rack
- Warm water
- Paper towels
Steps
- Cover your work surface with paper toweling.

- Fill your bowl with warm water. Note: cool water will set up the polish quicker.
- Shake your polish well and then drizzle it holding the bottle just above the water. You can choose any pattern you wish. It will take on its own life… just go with the flow. (Be careful to not drop the shaker bead in the water.)
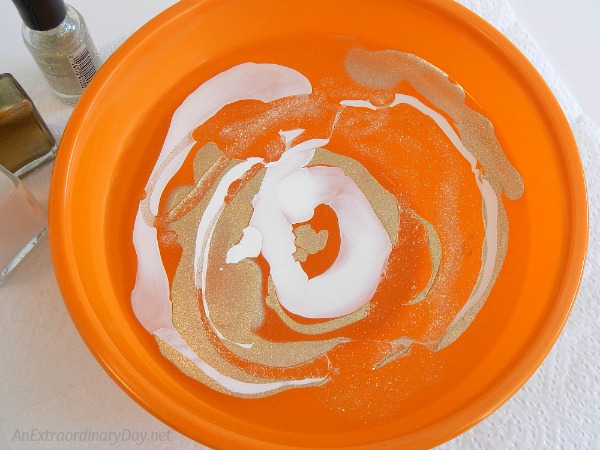
- Pick up your ornament by the top and quickly dip it in and out of the water. Immediately the polish will attach itself to the ornament in a swirly pattern. [Sorry. About this time I got so engrossed in my project I forgot to take photos, but I’m pretty sure it’s understandable with a photo.]
- Hang your marbleized ornament to dry. I used a wood dowel resting on two tissue boxes to hold my drying ornaments. Place a paper towel under the ornament to catch any water drips. Your ornament will be dry to the touch pretty quickly, but I allowed mine to dry over night before I put my ornaments back in their original package holders to store until decorating time.

Time
- Outside of procurement and set-up time… a half-dozen classy marbleized metallic Christmas ornaments can be be created in less than a 30 minutes… plus drying time. I think that’s pretty fast.
Note: Do not over think this. I did. At first it wasn’t quite what I expected. So I decided it was a fail. If you don’t like your first attempt… use the nail polish remover to start over. I did for two ornaments. They are the ones that have silver in the white and gold mix. BUT… be aware that if you are using a pearlized ornament the marbleized polish will come off as well as the ornament pearl color with the nail polish remover. I did that and ended up with a shiny silver which looked fabulous when it was marbleized again. Happy surprises.
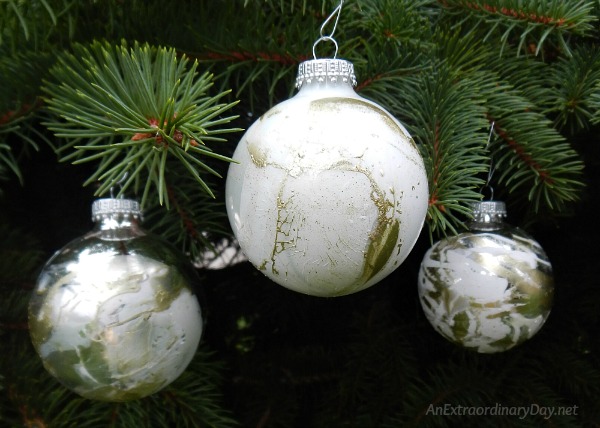
What was also interesting is that what I thought didn’t turn out… everyone around me raved about. This was one project that helped realize that just because I have an idea about how I want something to look doesn’t mean that it looks bad because it’s different than I anticipated. This was a huge lesson for me.
Here’s a look at the cost. My ornaments came from Hobby Lobby and I used the 40% coupon on my phone app and they ended up being about 75 cents each. Not bad. I used about a third of the polish I purchased in marbleizing the 6 ornaments, including two do-overs. The polish was just about $10 for the three bottles. I think you should be able to get at least 18-24 ornaments marbleized with 3 smallish jars of polish.
Let me know what you think. My husband was in awe. He thought the ornaments were beautiful and elegant. He has good taste, so I consider it a wonderful compliment.
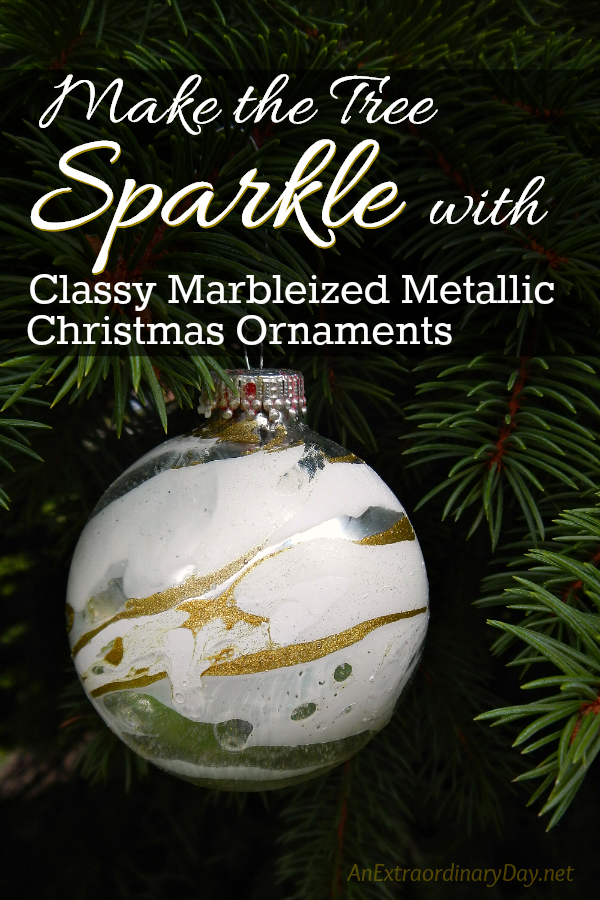
So what do you think? Will you give it a try?
Here are all 31 Bloggers in order of their appearance over the 31 Days.
Yesterday on Tuesday
The Silly Pearl
Cupcakes and Crinoline
Celebrating Everyday Life
AnExtraordinaryDay (you are here)
All Things Heart and Home (visit here tomorrow)
Petticoat Junktion
Sew a Fine Seam
Creative Crochet Workshop
Shabby Art Boutique
Morena’s Corner
From My Front Porch To Yours
Pet Scribbles
Sweet Pea
Dukes and Duchesses
Simply Kelly Designs
Town and Country Living
One Artsy Mama
The Crafting Nook
Our Southern Home
StoneGable
Love of Home
Lovely Etc.
Remodelando la Casa
504 Main
Knick of Time
Refresh Restyle
The Cottage Market
My Uncommon Slice of Suburbia
Heathered Nest
Sum of their Stories
There are lots of ways to keep up with our
extraordinary handmade Christmas ornament blog hop…
Follow An Extraordinary Day on Facebook where I’ll be posting links to each post daily.
Follow the Handmade Christmas Ornaments Pinterest page,
where the blog hop ornaments, as well as past ornaments we’ve created, will be pinned.
Follow Diane :: An Extraordinary Day!’s board Handmade Christmas Ornaments on Pinterest.
 Receive FREE inspiration like this in your inbox! Sign up Now.
 Check back here each day of the blog hop, where a direct link will be added below for each new post!


LOVE LOVE this ornament! How pretty it looks with that marble effect!!! I gotta try this!!!
Hugs
Thanks Camila! I hope you have fun experimenting. I love that every ornament is different.
Have a great day!
Absolutely gorgeous, Diane! I had never thought of that technique but now I can’t wait to try it!
Thanks Malia! I was trying to decide what I would make when I remembered Carolyn’s mugs and thought I needed to give it a whirl. I love that it’s a more elegant look. A little twist from the usual, for me.
All the best for an extraordinary day!
Diane, these are beautiful! I love the swirly and sparkly effect, so fun and so sophisticated too. And so much easier than it looks!
Thank you so much for dreaming up the idea of this blog hop! It’s been so fun seeing everyone’s ornaments!
It has been fun seeing what everyone is creating!
Thanks for your encouraging words, Steph. I really appreciate your partnership. It’s been fun. 🙂
these are so pretty, love the swirl!! Pinned
Awww… thanks Kristin. I look forward to seeing your creation, too! 🙂
You had me at metallic but addd marbleized to the mix and I’m in! These are just gorgeous…thanks for sharing ox
I so happy you love them too, Robin!! Thanks!
I’m excited to see what you share tomorrow… can’t wait!!
These are beautiful Diane! I think they would light up any tree. I love that these ornaments can be made with any color polish to match decor!
I confess to being a gold and silver fan for Christmas decorating… but I can envision lots of color possibilities. 🙂 Thanks so much for popping over and for your kinds words. 🙂
They are beautiful! I am going to try this!!!Thanks for the idea 🙂
Debbie
Thanks Debbie!! It’s really an amazing result.
Hope your week is off to an extraordinary start!
Oh, Diane, these are gorgeous. I would have thought the process to be much harder with how beautiful they are. You did an awesome job and your pictures are stunning (as always). I’m so happy to be a part of this hop with you.
hugs, mb
I’m so pleased that you like them. Thank you!! Once in a while something works out to be quite nice without a lot of work. Though it’s a rare occurrence in my world. 😉 And Mary Beth… I could never have done this without your support and encouragement. You are the best bloggy friend. 🙂 [hugs]
Your ornaments are absolutely gorgeous and I know that when you put them on your tree this Christmas that they are really going to sparkle. I’ve seen this technique before but I think that your version of it is my favorite. I’ve got a few glass ornaments that I bought on sale years ago that I want to use to try this. Now I just need the nail polish and I’m set.
Thanks so much for hosting the blog hop and for asking me to participate. I’m enjoying it so much.
Oh Paula… this blog hop has been so fun… more so than I had even hoped and I’m so glad you’re a part of it. Yay!!!
Thanks for your sweet comments. I think the reason that my ornaments are a little different is because I used a fair amount of polish which gives larger swaths of color. I’m anxious to get more ornaments and play some more.
All the best for an extraordinary day!
They’re beautiful, Diane! I love the sparkle and twirls, each one is so unique!
Thanks so much Cristina! I think it’s the uniqueness of each one that makes them so fun. 🙂
Those look like designer ornaments! I would never think to use nail polish. Love them!
Awww… thanks Kathy! That’s the beauty of this blog hop… we’re seeing so many crafty ways to create in new and fresh ways from our own usual ones. So glad you could join us in the fun. Have a blessed day!
I think they are very lovely! I will try this as well and really appreciate you sharing your experience and beautiful results! Thank you!!
🙂 Thank you Angie!! I hope you have fun making your own.
You have to work fast and it’s really so easy. Just a little smelly. 😉
Hope your weekend is extraordinary!
Nail polish – I never would have thought of that! These are gorgeous!
Isn’t it fun to do something totally unexpected?
Thanks for your kind words, Angie!
Have a blessed weekend!
Diane these turned out beautiful! Thank you for asking me join you ladies.
Thanks Pamela… they are amazing quick to do and don’t we love that?!!
I am so blessed to have you join us. You are always such an inspiration to me. [hugs]
These are so pretty and elegant! I love that you could change up the colors to go with any decor as well. I may just have to make myself some this year!
Awww… thanks Carrie!! I’ve been into a metallic theme lately, but I absolutely agree, with all the gorgeous colors in polish you could come up with some awesome combos. Have fun giving it a whirl!!
These are spectacular!!! Love the sparkle!
You are so kind Christy!! Thank you! A girl needs a little glitz. 😉
Love, Love, Love your handmade metallic/marbleized ornaments!! I have pinned and will definitely make for this year’s Christmas tree….they are so unique and different! Thanks for sharing!
Blessings,
Lanita
Thank you so much Lanita! They have that “designer” look and it’s so amazing. I really can’t take any credit for it… it’s the beauty of the process. Hope you have fun making yours!!
All the best for an extraordinary day!
Such a brilliant idea to use nail polish! I never would have thought to do so! These ornaments turned out so stunningly elegant!
You are so kind, Laura. 🙂 Thank you! Isn’t it funny how one idea will stimulate another? I’m grateful to Carolyn for sharing her marbleized mugs some time ago. Some how that memory came to mind when I was dreaming about what to create. I hope you experiment with some, too. 🙂
Thank you for sharing these beautiful ornaments. Can you mix the mai polish in a squirt bottle and pour inside the ornament and swirl it?
Thank you, MaryLou!!
I really don’t know, but I would think that because the squirter would be plastic, the polish would quickly stick to it and the bottle and gum things up. However, if you like, you might try drizzling some polish right into the ornament and “swirling” it around, and then turning it upside down for any to drip out. An egg carton works well for the drying holder. Let me know what you do and how it works out!!