Do you remember those days as a child when you would collect fistfuls of autumn leaves?
Maybe it was just last week that you found yourself picking up pretty leaves on your walk?
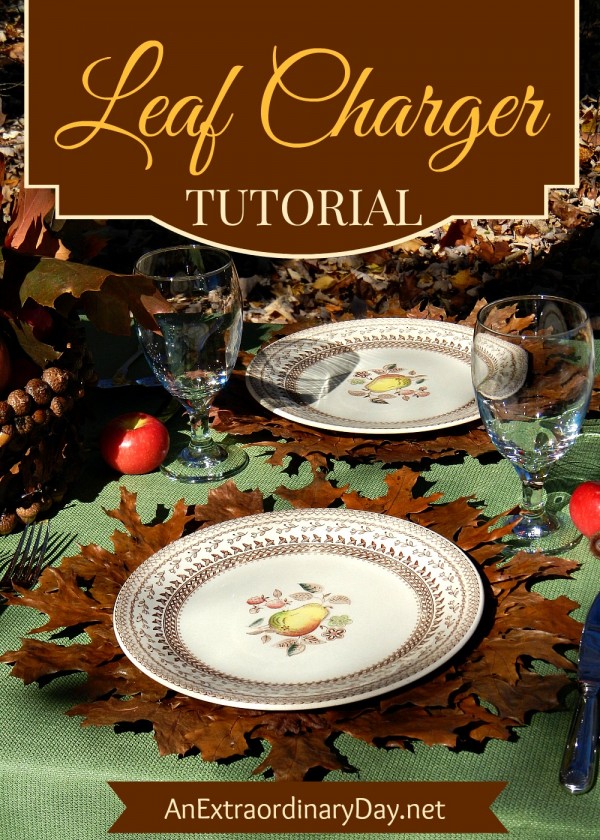
Please… “Pin” – “Tweet” – or “Share” this image!
I’m always on the look out for creating home decor with nature’s bounty.
It does seem that Mother Nature couldn’t deliver any more leaves than she’s been raining down on us the past few weeks.
Actually, it’s all been quite convenient for me.
I have been planning an autumn tablescape but feeling like there was an important missing ingredient.
And then it hit me!
All the leaves…
They would be perfect for my tablescape…
Fashioned into natural leaf chargers.

I know you’ll want to make some too!
They not only make great chargers, but they also are perfect for vignettes, centerpieces, and more!
So without further ado…
Let’s Make Natural Leaf Chargers
Supplies:
- Oak Leaves
- Newspapers and/or Kraft Paper
- Rust-Oleum Clear Gloss Spray
- Kraft paper
- Ruler/Tape Measure
- Large object like a bowl or lid
- Pencil
- Fiskars Scissors
- Low Temp Glue Gun
and Multi Temp Mini Glue Sticks
Steps:
- Begin by collecting leaves. I used oak leaves because they are super sturdy.
- Pick up flat leaves for this project, though you will ‘semi’ press them.
- There are many oak varieties. Your charger will be more interesting if you can get a few different varieties.
- One charger takes at least 25 leaves of varying sizes.
- Here’s how I prepared the leaves:
- The first thing I did was to lay the leaves I gathered on large sheets of Kraft paper and newspaper.

- Then I covered the leaves with another sheet of paper.
- To weigh them down some, I placed pillows on top of the paper leaf sandwich.
- I left it overnight and the leaves dried some and were flattened, but not pressed.
- The next step was to take the leaves outside, lay them on newspaper, and spray them with Clear Coat.
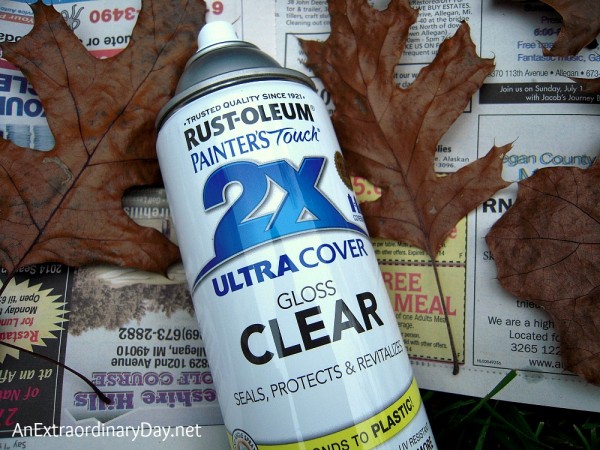
- The Clear Coat dries fairly quickly. When the leaf is dry to the touch, turn it over, and spray with another Clear Coat.
- Allow the leaves to dry for a short while before gathering them up.
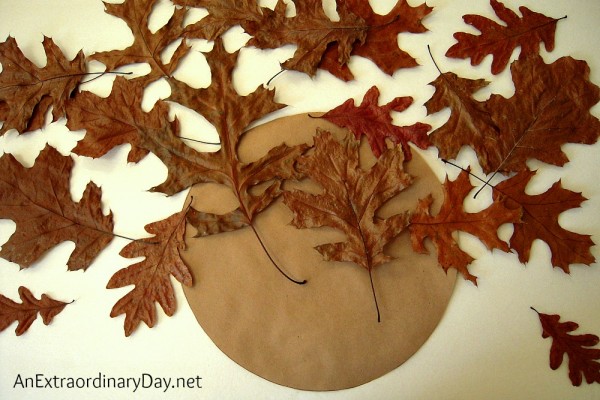
- Get ready to create your leaf charger. Lay your Kraft paper on your work surface.
- Find a large bowl of lid from your kitchen that is about 10-11 inches or about the size of your dinner plate.

- Lay your round object on the Kraft paper and with your pencil draw around it so that you have a circle.

- With your scissors, cut out the circle.
- Repeat for as many leaf chargers you will be making.
- Because you will be gluing, protect your work surface.
- Place a Kraft paper “charger base” on your work surface.
- Gather a variety of leaves in sizes from your collection of leaves.
- Trim the stems off your leaves so that they will be flatter.

- Do a test run before gluing leaves in place.
- Lay leaves around the edge of the charger.

- Then lay a second round of leaves, in between the first layer, being careful to hide the brown Kraft paper with the leaf tips.
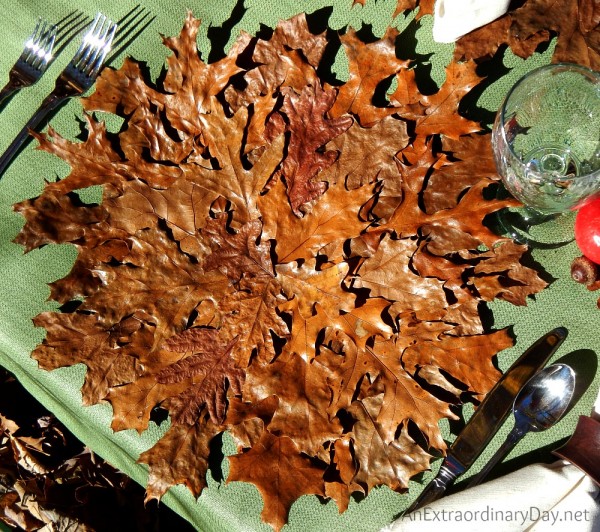
- Continue adding leaves to cover the brown Kraft paper and create a lovely design for your charger.

- Now that you have a feel for it…repeat the process only this time, using your low temp glue gun, add a dot of glue to the leaf and glue to the Kraft paper repeating the process.
- Here’s how it will look on the back of the charger. A very clean look.

That’s it! Four chargers can be made in an hour or two.
I plan to keep mine for another year by storing them in an envelope I make from the roll of kraft paper I purchased. If you have two larger pieces of cardboard…all the better.

There’s still time to create gorgeous oak leaf chargers for Thanksgiving.
If you are already set for your Thanksgiving table, be sure to “pin” this post for next year.
I love natural elements in home decor for fall. Hope you do too!
In what ways have you used oak leaves or other natural elements in your fall or Thanksgiving home decor?
Tell me what you’re working on. I’d love to see.
Thank you for stopping by today.
If you enjoyed this post….please pass it on to your friends.
Click any of the sharing buttons at the bottom.
Best wishes for An Extraordinary Day!
Diane
p.s. I recently joined Twitter…if you’re there too, would you follow me? I’ll return the follow. It’s imperative that I grow a following quickly….if you can help….you’ll make my day!! Thank you!!!
To receive FREE bits of inspiration like this
in your inbox or reader, subscribe now.
Let’s connect! Facebook :: Pinterest :: Google + :: Twitter :: Shop-Longaberger Lifestyle
**AnExtraordinaryDay.net is a participant in the Amazon Services LLC Associates Program,
an affiliate advertising program designed to provide a means for sites to earn advertising
fees by advertising and linking to amazon.com
The Journey Back + Natasha in Oz + Tatertots and Jello + Be Different Act Normal + 3 Little Greenwoods + The SITS Girls + Whipperberry + One More Time Events + Life on Lakeshore Drive + Pieced Pastimes + Flamingo Toes + House of Hipsters + Dwellings + That’s What Che Said + A Pinch of Joy + It’s Overflowing + It’s Overflowing + I Should be Mopping the Floor + The DIY Showoff + Silver Pennies + Sew Can Do + by Stephanie Lynn + Carrie This Home + Between Naps on the Porch + Life in Balance + Coastal Charm + Cozy Little House + A Stroll Through Life + The Scoop + My Uncommon Slice of Suburbia + Our Home Away from Home + Home Stories A to Z + Carolyn’s Homework + The SITS Girls + The DIY Dreamer + Green Willow Pond + Savvy Southern Style + Simply Designing + DIY by Design + Jennifer Dawn + SNAP! + Someday Crafts + Somebody’s Dinner + The Happy Housie + Fine Craft Guild + From My Front Porch to Yours + Share Your Cup + Live Laugh Rowe + Posed Perfection + Katherines Corner + Self Sufficient Home Acre + Dwell Beautiful + Embracing Change + Joy in Our Home + Rooted in Thyme + Living Well Spending Less+ Imparting Grace + The Charm of Home + French Country Cottage + Nancherrow + Shabby Art Boutique + Shaken Together Life + Craftberry Bush + AKA Design + Too Much Time + My Romantic Home + Shabby Nest + Liz Marie Blog + Art of 66 + Serenity Now + Bacon Time


Hi Diane! These are perfect ly beautiful! Im not having company but think I’ll make one for my kitchen island!
You should Lucy! It will be a stunning piece for your island. Let me know if you do…better yet…post it on my page on FB and I’ll share it. 😉 Thanks for you kind words. {hugs}
See? Another great project that can’t be done with cactus!! I think someone out there should take pity on me and send me a box of leaves and acorns!! Actually, after your post on the acorns, I got on Ebay and found that you can actually buy them!! Not so much leaves. (sigh) I’ll just enjoy reading your posts, I guess! God bless you, girl! Dona
Donna…we just got 8 inches of snow…so I don’t know if I can help you with the leaves…but I surely would have been happy to send you some. Remind me next year…early…and I will for sure. 😉 Seriously….I will!! BTW…I have another project coming up that uses both. I know…you’re going to love me now. :-/
As far a cactus… 😉 I give that some thought!
Okay…I did. Sorry…I didn’t come up with anything. 😉
All the best for an extraordinary weekend!
Wow! That is so creative and yet so simple! You could also use these as part of your centerpiece at Thanksgiving.
My husband told me I should hang one on the wall in a gallery arrangement. 😉
Thanks for popping by with your kind words Barb!
All the best!!
Love this idea,can’t wait to try it.Thank you for sharing and have a Blessed day.
I love this, I truly love this!
Awww…thanks Cathy!! It was one of those projects that just made my heart happy!
All the best for an extraordinary start to your week!
Very cool idea! Love it!
Awww…thanks so much Ginger!! 🙂
Blessings!
What a cool idea! I hope you will link it up at the Found & Foraged Linky Party tonight!
Thanks so much for linking up with Found & Foraged! This was a great idea…and I’ve not used clear coat like that before, so it’s good to know about it!
Diane, I love how these turned out! We don’t have many fall leaves around here, but I loved that you used natural elements! 🙂
We are so glad you came by the party! See you next week
Such a beautiful and unique idea. Love that you share it with Share It One More Time. Cathy
I love this idea….it’s just beautiful!
These are just awesome Diane! Fabulous idea and great tutorial! LOVE it~
Gorgeous, Diane! I pinned your post for next year – great suggestion. I love these chargers you’ve created…hope my leaves do OK next year.
i love this idea! they look fabulous. i would love to make a runner version of this. thanks for the inspiration! warmly- mj
https://maryjomaterazo.typepad.com
Oh this is too neat! I love that it could last for another year too! I am not sure if we have any oaks other than pin oaks but maybe some of the other leaves will work! Should be a fun project!
Thanks so much for sharing this at the Say G’Day Saturday linky party. Hope you have a wonderful week!
Best wishes,
Natasha in Oz
absolutely love this idea!!
my daughter has been collecting leaves on her walks to the mailbox.
she has them in between her art journal pages…I’ll be sharing this idea with her, thank so much!
#SITS
Great tutorial! And I love that shot of the charger in the leaves!
Wow! These are so cool! These would be perfect on a Turkey Day table!
Stopping by from the Thrifty Thursday like party. 🙂
Absolutely gorgeous!! Thanks for the tutorial–I’m pinning this!
What a stunning idea! Must steal for self 😉
These look lovely! Thank you for sharing them with us this weekend!
This whole table is wonderful! Thanks for sharing!
I LOVE this idea! I am always looking for cheap unique ways to decorate for our church events. 30+ tables that need a center base to build on can get very expensive when you have to purchase other items. Even if I spend $1 per item and have 5 items per table, $150 is a lot to spend especially if it’s a fundraiser so this is absolutely perfect. I live in SE Texas where Tropical storms Harvey and Imelda flooded our area. We’ve lost lots of decorating items so something I can go outside and pickup for free is amazing! And as abundant as flood water has been, leaves are even more abundant.
For my home use I think to make them a little more sturdy and easier to move I will use a cardboard round that is sold cheaply for bakeries to put under their cakes. And to keep the price down to only glue and spray sealer I think cutting up boxes would work. Hmmm, round plates, round pumpkins, maybe a square charger would be a great alternative and much easier to cut from my Amazon boxes. Thanks for a great project that I can make with a friend that recently had a double knee replacement, it should keep us busy!
This is certainly cheap, Vickie… but I can’t imagine doing SOOOOO many! Hope you have many happy hands to help you because it will look amazing for sure!! All the best!
Dona, I can’t see what year you posted but today is 9-28-19. If you still want leaves I’d be happy to send you a box. Just no idea how to communicate with you without publically posting my information. If you actually get this and would still like to do the project perhaps you can find a way to privately share addresses. I have several types of oaks, sweet gum, maple, sycamore, tallow/chinaberry (like an aspen) and others. Maybe I can send you leaves and you can send me cactus!
I love this idea of making leaf chargers! It brings back memories of leaf collecting as a kid. Using oak leaves is smart for their sturdiness. I wonder if other leaf types would work too? Can’t wait to try making some for my own autumn tablescape! 🍁