Looking for a simple, low-cost, out-of-the-ordinary way to add pizzazz to your Christmas decor?
And maybe at the last minute too?
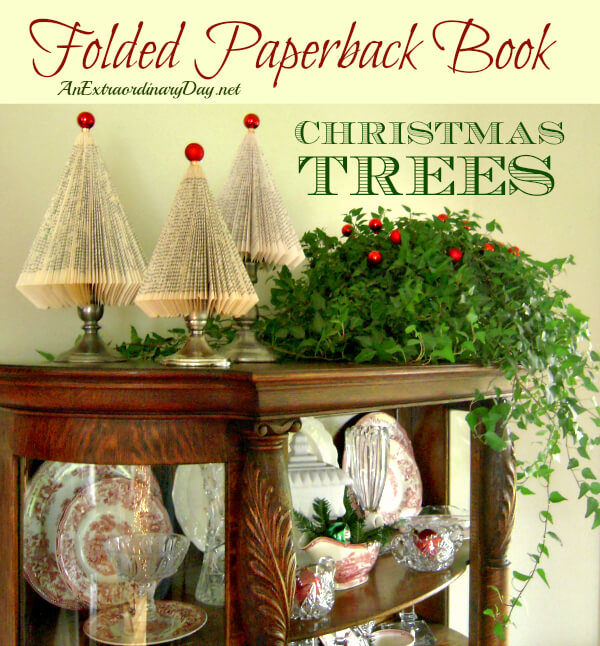
Try your hand today at making Folded Paperback Book Christmas Trees. It’s super easy! My husband says if you can make a paper airplane, you can make these. In his words, “It’s like folding the left wing 200 times!” He even folded the three trees gracing the top of my vintage china cabinet here.
 This post contains affiliate links.
To make it even easier for you, I created the….
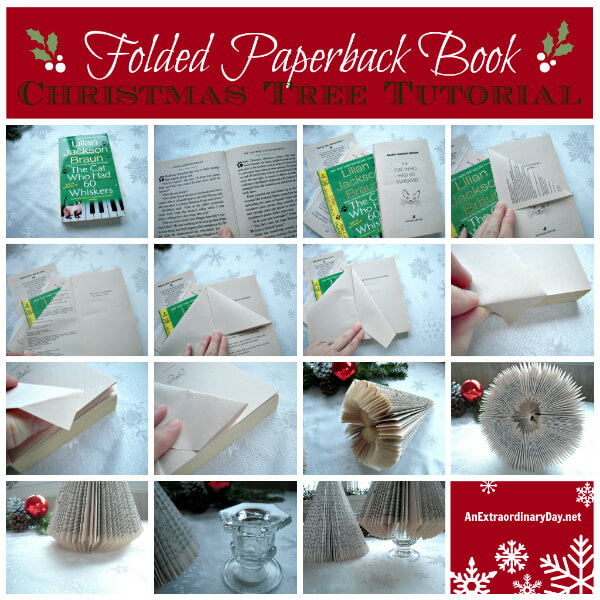
Folded Paperback Book Tree Tutorial
First…check out the photo collage. If you need to know more. I’ve spelled out the details below. There’s even a second photo collage to show you how I added the sweet Christmas red tree toppers.
Steps to Make a Paperback Book Christmas Tree
Let’s start…
- You’ll need a paperback book you’ve read many times, or picked up one or more at the thrift store.
- Fold back the pages and break down the spine so it becomes more flexible and opens up the pages of the book.
- Tear off the outer cover and a few of the first and end pages. Note: you don’t need more than 200 pages, so feel free to reduce the book by the amount necessary. A long book could produce 2 trees.
- Take the first sheet and fold in tight to the edge of the spine. Try to keep your point a clean as you can. Keep doing this for as many pages as your book has.
- Start again, this time, fold the first and subsequent pages with the edge close up to the spine again. You should have a narrow and thicker page that looks sort of like the tip of a man’s tie.
- Keep on until you have folded all the pages.
- You now have a tree! Wasn’t that easy? And now you have a choice to make. You can either set your tree on the table, or on a stand, such as a candlestick or votive holder or another fun base. For the “tree trunk,” I used a glass candlestick holder like this (affiliate link) for the many gifts I made. If you choose to use a stand, you can quit now with the folding if you wish. I like that look. However, if you are going to set it on the table, I suggest that you fold the bottom point of the “tie” to create a flat bottom for your tree. You may choose to tuck this flap inside the previous fold. If you have a lot of heavier pages, it may not be necessary to tuck in the page.
- Stand back and admire your Folded Paperback Book Tree!
To make your Folded Paperback Book Tree a Christmas Tree, you’ll want to add a Tree Topper.
Here’s a super easy Tree Topper Tutorial. Again, enjoy the photo collage….an explanation will follow.
Tree Topper Tutorial

To add a Tree Topper…
- Assemble these Supplies: (Note: this list contains an affiliate link**.)
- You will be making multitudes of these trees, so spring for a whole package of tiny Christmas Balls. This pack cost me $1 at the dollar store.
- A glue gun
…this makes the job quick.
- A glass candlestick holder like this
.
- A completed paperback book tree.
- Slowly pull the decorative surround and wire hanging hook off from the base of the ornament. Note: My Christmas Balls were glass….so be very careful if yours are glass too.
- Then pull the wire hook from the decorative base.
- Place a dab of glue on the neck edge of the Christmas Ball.
- Slip the decorative top on the glued ball immediately.
- Place a dab of glue on the center of the top of your completed paperback book tree.
- Immediately place the completed Christmas Ball, decorative end side down, on the glued tree top.
- Stand back and admire your handiwork.
Now wasn’t that easy?
Assuming you have a supply of paperback books and a glue gun, you can create at least a dozen Folded Paperback Book Christmas Trees for a dollar! Yes…some of the best things in life are nearly free.
If you have the time and are crafty, you might want to spray paint your trees, add glitter, make paper ornaments, and add garland, photos, words, or angels. Have fun with it. It’s great to do with a group and children too!
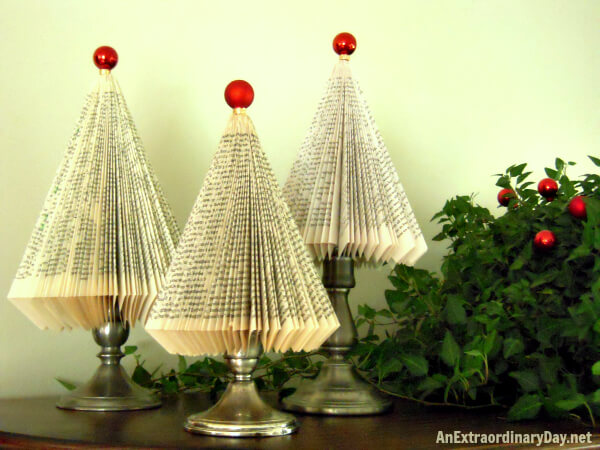
A trio of trees is making a magic moment with my summer ivy plant on top of my china cabinet. Notice I didn’t make the last fold which gives the trees a flat bottom. Since I was setting them up high on a stand I liked this look. I used a variety of pewter and silver candlesticks for my tree bases. Be creative. I think the base really makes the tree more festive.
And…since I didn’t use all the Christmas Balls for making trees, I added the balls to my ivy for a more Christmasy look. First I removed the wires and decorative tops from the Christmas Balls. Then, I stuck kabob skewers in the plant, cut them to the appropriate length with my pruners, and then added a dab of hot glue to the end of the skewers and stuck the Christmas Balls on the skewers. Voila!

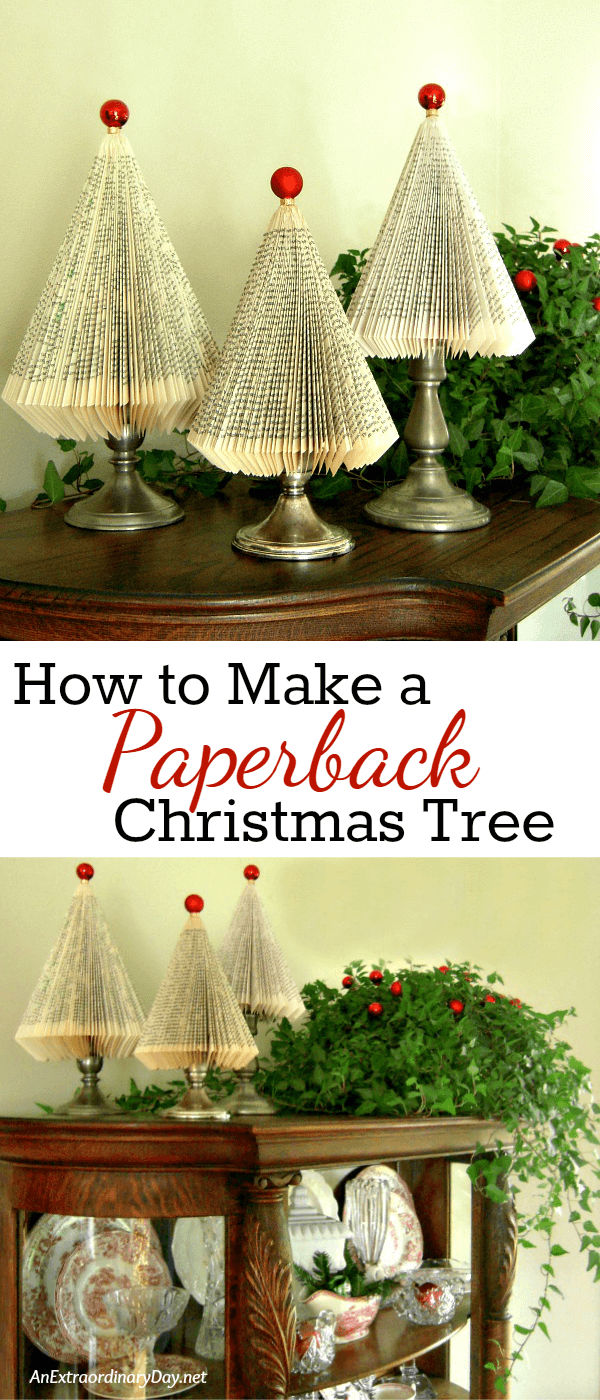
A fun, fabulous, whimsical, easy, and low-cost bit of Christmas decor. And even a “How-to” guide for producing trees in masses. I love mine….and I’m pretty sure….you’ll love yours too.
So what kinds of things have you done to make your home more festive without costing an arm and a leg?
Thank you for stopping by today.
I appreciate you and your sweet comments make my day.
If you enjoyed this post….please pass it on to your friends.
Wishing you a festive and joyous CHRISTmas!
Diane
To receive FREE bits of inspiration like this
in your inbox or reader, subscribe now.
For More Christmas Decor Inspiration…please check out these recent posts:
 A Very Merry Christmas House Tour


SO, SO ADORABLE!!!!!!!!! I love book page projects and this is my new favorite!! I’m totally pinning this!! Thanks for sharing Diane!!! 🙂 Hugs, Jennifer
Thanks Jennifer!!
It’s so fun! We made bunches of them for gifts and everyone loved theirs. We just got little candle holders and votive holders at the dollar store and hot glued them on. It’s a win all around! I’ll be watching to see one or more appear on your blog sometime. 😀
These are fantastic! I love the look of book pages. A beautiful project! 🙂
Thanks Jennifer! You are such an encourager!! I confess to being over smitten with anything book pagey. 😀
This is very cute and a clever way to reuse an old paperback! Thanks for sharing this idea. I will be pinning this one. Merry Christmas!
You are so kind! I’ve been thinking of making these for a while and in the busyness of the season asked my husband if he wouldn’t mind helping me by doing all the folding….and he made them all….and another dozen for gifts. I got the fun decorating part of the joy. Yes…I’m blessed!
May your Christmas be filled with joy overflowing!
These are fabulous! Thanks for the tutorial! Merry Christmas!
Jennifer! I so admire everything you do….what a lovely thing to say!
Christmas blessings sent your way!
Well, bless his little pea pickin’ heart! That makes them even more special!!
I think they’re adorable on those candle stick stands!
Oh yes, he blessed me big time!!!!
But, it didn’t stop there. He folded another 14 for his fellow staff members. I just added the bases and the pretty tops.
Hi Diane, this is my first time here and I think this is great~I’ve seen making the tree before but this is my first time to see it on top of a candle holder and topped with a Christmas ball!
A blessed Christmas to you and your family! Patsy from HeARTworks
Hi Patsy! Welcome! I hope you will return and join in the community here!
It was fun to add a new twist to these super-cute trees.
Merry Christmas!!!
I just read this and its past Christmas….however I am eager to make one or ten. I love trees and birds…maybe a valentine tree? Fun…thanks for the post.
They are so fun and easy to make, Vicki. Change the “top knot” and make it any season’s tree you wish. See where your creativity takes you. I thought about making a harlequin tree for fun….can you see it? Enjoy!
Diane, I was poking around your lovely site and I found this post…I am in love with these trees! I know that it’s not even Halloween yet, but I am pinning this and I am going to get started making a few right away! What a super sweet idea! 🙂 Kim
That just makes my day, Kim!! 🙂
You’ll have fun making the trees…well…you’ll have fun with them when they’re all done. 😉 Folding pages is a wee bit tedious….but so worth it!!
Blessings!
~Diane
I actually saw one of these at a dinner I went to last night! I was going to pick it up and inspect how to DIY, but never did. Then this link comes on my twitter today! It’s a sign 🙂 THANKS!
Yay!! I love it, Janet!!
And I think others saw it on twitter too, since I’ve been getting traffic. I’d sure like to find the source of the blessing.
Have fun making one or a forest of trees. 😉
Hope your weekend is Extraordinary!!
WOW!! Love these 🙂 and I know where there is a used book store…. would love if you hooked up to our Snickerdoodle Sunday! http://2crochethooks.com/snickerdoodle-sunday-8/
🙂 I think I see some tree-making in your future!! Thanks ladies!!
LOVE these!! Thanks so much for sharing the tutorial! Pinned 🙂 … Merry Christmas!
Awwww…thanks Brenda!!
Thanks for the ‘pin’ and for popping by with your sweet words.
Merriest of Christmases to you too!!
I love these! Thanks for the super easy tutorial! I made myself 4 of them from one book! My book was almost 300 pages and I ended up with two large trees and then I cut the remaining in half and made two half size trees! They are so cute!
Tania
Oh Tania….you are so welcome!! I love what you accomplished. How fun that you have big and little trees!
Thanks for sharing!! [hugs]
Hope you didn’t mind me sending some many in your direction. Your Christmas trees look so lovely and your tutorial so good.
Sarah x
Sarah….I am delighted!!! Thank you so much!
[hugs]
~Diane
fabulous 😀
Awwww…thank you so much!! 🙂
Stopping by from The Shabby Nest. These are so cute. I tried these once and failed. Your tutorial breaks it down so well though. I think I’ll give these a try again:)
Oh Katie…do try again. I think you’ll find much success and end up with a delightful forest.
Merry Christmas!
Your trees are just beautiful! We have plenty of old books around here to give it a try. I can’t wait! Thanks for sharing, visiting from http://www.thelifeofacraftcrazedmom.com!
You are so sweet, Melissa! Thank you. Have fun making your own little forest.
Blessings!
Thanks so much for the tutorial. I have just made one with the half a book I had left over from making a book wreath. So easy although the end product looks like it would take forever!
I am so pleased that you are finding my tutorial helpful, Louise. You’re right…they are really easier than they look.
Enjoy your new tree. 😉 I bet it’s going to find some company soon. Yes?
Great craft, Diane! They look terrific! I will be featuring your post in this week’s Home and Garden Thursday,
Kathy
Awww…you are sooo sweet Kathy. 🙂 Thank you from the bottom of my heart!
Thank you for this wonderful tutorial! I am making these as gifts. I have to tighten my budget belt.
So, this is perfect.
Thanks again.
Debbie, I’ve made lots of them for gifts since this post. They are unusual gifts and they go over really well! One of my friends said that it was one of her favorites and I’ve given her a lot of handmade gifts. (And this was surely easier, quicker, and cheaper!)
Thanks for popping by! Hope your holiday season is extraordinary!
Diane, your trees are beautiful. I noticed them in the sidebar of your site, so I had to check them out. You know how much I love your book page projects. This adds another one to my favorites list!
Kim…I’m amazed at how popular that tutorial has been. Yay for Pinterest!! 🙂
Seriously… those trees make my heart sing and they are so easy to do… when you’re listening to Christmas music or a podcast. 😉
Will I see one or more on YOUR blog??
Blessings!
Wow, this is really amazing. I wish I can use old newspaper and get the same results. I have tons of newspaper that I want to put to good use, rather than just thrown in the dumpster.
i broke back the spine like directions said and a lot of the pages came loose!
Oh no!! I’ve made lots of trees and never had that happen. I bet your book was super dry. You might need to put a thin coat of paper glue down the spine and let it set up a bit before starting your folding again. Hope everything turns out beautifully!
Love, love, love these trees! Just made my first one, and your tutorial is spot on! Thanks for sharing your expertise.
I’m thrilled that it worked perfectly for you, Katrina! It’s such fun and the results are fabulous!
All the best for a happy holiday season!